
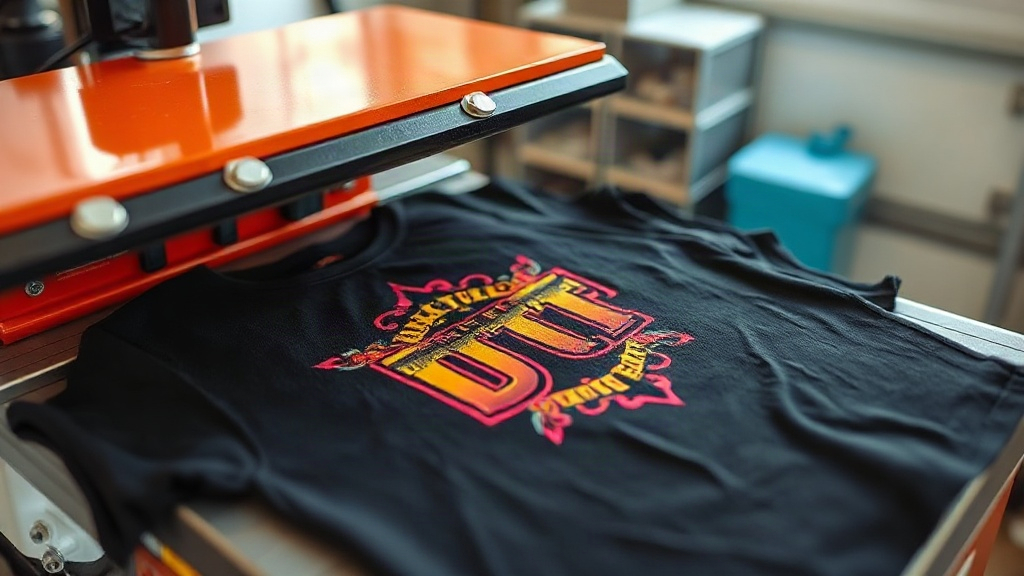
Imagine pressing a vibrant, full-color design onto a dark cotton t-shirt without worrying about weeding or layering. That's the promise of DTF transfers, a digital printing technology that has taken the custom apparel world by storm. Unlike traditional methods that require multiple steps, DTF simplifies the process while delivering impressive durability and detail. Whether you're a hobbyist or a small business owner, understanding DTF can open up new creative possibilities.
In this guide, I'll walk you through everything you need to know about DTF transfers, from how they're made to how you can apply them like a pro. I'll share insights from my own experience working with DTF in a small print shop, where we've tested countless variations to find what works best. By the end, you'll have the knowledge to produce stunning, long-lasting prints on a variety of fabrics.
What Are DTF Transfers?
DTF stands for Direct-to-Film. It's a printing method where your design is printed onto a special film using a DTF printer, which lays down a layer of white ink followed by CMYK colors. While the ink is still wet, a fine powder (often called hot-melt adhesive) is applied and then cured. The result is a flexible, transferable decal that can be pressed onto fabric.
The magic of DTF lies in its versatility. Because the film carries the design and adhesive, you can apply it to almost any fabric: cotton, polyester, blends, even leather. And since the white ink acts as a base, colors pop on both light and dark garments. No more needing separate vinyl for different colors or pre-treating shirts like you would with DTG.
How DTF Transfers Differ from Other Methods
Compared to heat transfer vinyl (HTV), DTF eliminates the weeding process, which saves hours on complex designs. Unlike DTG (Direct-to-Garment), DTF doesn't require pre-treatment and works on a wider range of fabrics. And unlike screen printing, DTF is cost-effective for small batches and full-color images. Each method has its place, but DTF shines for detailed, multi-color designs on demand.
The DTF Transfer Process: From Design to Press
Creating a DTF transfer involves several steps, each crucial for a quality result. Here's how it goes:
- Design Preparation: Start with a high-resolution image (300 DPI is ideal). Mirror the design horizontally because the film will be flipped when pressed. Ensure your design has transparent background if needed, and consider the white ink layer: DTF printers automatically generate a white base under the colors, but you can adjust its density in the RIP software.
- Printing: Load the DTF film into the printer. The printer prints the white ink first, then the colors on top. This order is critical for opacity and vibrancy.
- Powdering: While the ink is still wet, the film passes through a powder shaker that applies hot-melt adhesive powder evenly. Excess powder is removed.
- Curing: The film goes through a curing oven or under a heat press to melt the powder, creating a smooth, dry surface. This step also ensures the adhesive will bond properly during application.
- Pressing: Once cured, the transfer is ready to apply. Set your heat press to 300-325°F (150-160°C) with medium pressure. Press for 10-15 seconds, then peel the film while it's hot (or cold, depending on the film type). For best results, do a second press with a Teflon sheet for 5 seconds to smooth the print.
Each step requires attention to detail. For instance, if the powder isn't cured enough, the design may crack after washing. If the press temperature is too low, the adhesive won't activate, leading to peeling. I learned this the hard way when I first started: a batch of shirts peeled after one wash because I rushed the curing stage. Now I always double-check with a infrared thermometer.
Choosing the Right DTF Supplies
Not all DTF films and powders are created equal. The market offers various options, and selecting the right combination can make or break your results. Here's what to look for:
- Film: Look for double-sided matte film or single-sided coated film. Matte film tends to hold powder better. Thickness matters: thinner films (75-100 microns) conform better to fabric textures, while thicker ones (100-125 microns) are more durable but may feel stiffer.
- Powder: TPU-based powder is standard. Particle size affects feel: finer powder (80-170 microns) gives a softer hand, while coarser powder (170-250 microns) is more durable but can feel gritty. For apparel, I recommend fine powder for a comfortable wear.
- Ink: Use DTF-specific inks, usually pigment-based. They must be compatible with your printer. Cheap inks can clog printheads or fade quickly.
- Printer: You can convert an Epson printer with a DTF kit or buy a dedicated DTF printer. For beginners, a converted Epson EcoTank with a DTF ink system is a cost-effective entry point.
When I first started, I tried a no-name film that was half the price of the brand I now use. The prints looked fine initially, but after a few washes, the edges lifted. Switching to a reputable brand solved the issue. Sometimes saving a few dollars upfront costs more in wasted time and materials.
Applications and Fabric Compatibility
One of the biggest advantages of DTF is its ability to adhere to a wide range of materials. Here's a quick breakdown:
- Cotton: Excellent adhesion, vibrant colors. Works well on both light and dark.
- Polyester: Good adhesion, but requires lower pressing temperature (around 280°F) to avoid dye migration. Use a low-migrating powder if possible.
- Blends: Generally good, though 50/50 blends may need slightly higher pressure.
- Nylon: Possible but tricky; requires a special adhesive powder and careful temperature control.
- Leather: Can work with low temperature and a protective sheet, but test first.
For tricky fabrics like polyester, I always do a test press on a scrap piece. Dye migration can ruin a print, turning white areas pink. Using a low-temperature powder and pressing at 280°F for 10 seconds usually prevents this.
Common Pitfalls and How to Avoid Them
Even with the best supplies, things can go wrong. Here are some common issues and solutions:
1. Print Peeling After Washing
Cause: Insufficient powder, under-curing, or wrong pressure during application.
Solution: Ensure powder is evenly applied and cured until it's glossy (not matte). Press with firm pressure (40-60 PSI) and check that the adhesive has fully activated. Wash inside out in cold water and avoid fabric softener.
2. Colors Look Dull
Cause: Not enough white ink or incorrect color profile.
Solution: Increase white ink density in your RIP settings. Calibrate your printer and use ICC profiles for accurate colors.
3. Film Sticks to Press
Cause: Pressing too hot or not using a protective sheet.
Solution: Lower temperature to 300°F and use a Teflon sheet or parchment paper between the film and the heat platen.
4. Design Cracks When Stretched
Cause: Too much powder or over-curing.
Solution: Use finer powder and reduce curing time. Also, ensure the design isn't too thick; thinner ink layers are more flexible.
I keep a notebook with settings for each fabric type. It saves time and reduces waste. For example, for a 100% cotton tee, I use 320°F for 15 seconds with medium pressure, and peel hot. For a polyester jersey, 280°F for 10 seconds, peel cold. These little details make a big difference.
DTF Transfers in Action: A Real-World Example
Last month, a local gym asked me to print 50 tank tops with a detailed logo that had gradients and small text. Screen printing would have been expensive due to the number of colors, and HTV would have been a nightmare to weed. DTF was the perfect solution. I printed the transfers in a day, pressed them onto the tanks in a few hours, and delivered. The client was thrilled with the vibrancy, and after several washes, the prints still look new. That's the power of DTF: it makes complex jobs simple.
Frequently Asked Questions
How long do DTF transfers last?
With proper application and care, DTF transfers can last 50+ washes. The key is correct curing and pressing. Avoid ironing directly on the print and wash inside out in cold water.
Can I use DTF transfers on dark shirts?
Absolutely. DTF transfers include a white ink base that makes colors pop on dark fabrics. No need for a separate white underlay like with some other methods.
What temperature do I press DTF transfers?
Generally, 300-325°F (150-160°C) for 10-15 seconds. For heat-sensitive fabrics like polyester, lower to 280°F (138°C) and press for 10 seconds.
Do I need a special printer for DTF?
You can convert a standard inkjet printer (like Epson) with DTF ink and film, or buy a dedicated DTF printer. For beginners, a converted printer is more affordable.
Can I stretch DTF prints?
DTF prints are flexible but not infinitely stretchable. They can handle normal wear and movement, but excessive stretching may cause cracking. Using fine powder and proper curing minimizes this.
DTF transfers have revolutionized custom apparel for small businesses and hobbyists alike. With a bit of practice and the right supplies, you can achieve professional results that rival any commercial print. So go ahead, experiment, and watch your designs come to life on fabric.